Sunday, September 8, 2013

Chocolate Fantasy | Chocolate Sponge Cake

One more long weekend thanks to festival and I got started with baking. Guests visiting was an added bonus. That meant I needed to beautify the cake so that the kids would want to eat it...

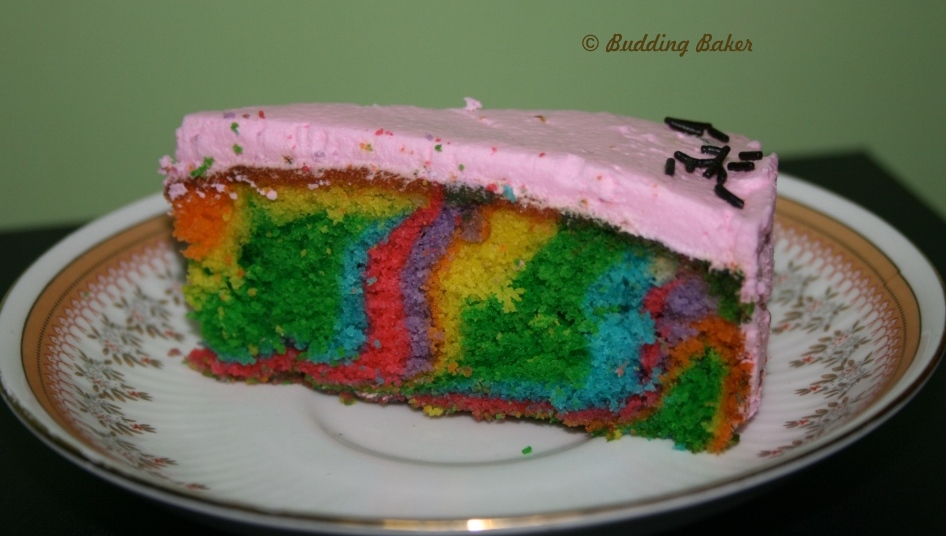
Anyway, the end product looked decent. At least to me. What do you think?

Chocolate Cake with Dark Chocolate Ganache
Not bad, eh? I thought so too.. Le Cordon Bleau, I am coming soon! :-)


Chocolate Cake Recipe

Ingredients:
1 cup Flour
1/2 cup cocoa powder
1 cup powdered sugar
3/4 cup vegetable oil
4 large eggs
1 tsp baking powder
1 tsp vanilla essence

Method:
Sift flour, cocoa and baking powder together twice.
Beat eggs till light and frothy to about 3 times the original volume.
Add the vanilla, sugar and beat again for about 2 minutes.
Pour in the oil continuously in a stream while continuing the beating.
Fold the flour mixture gently into the wet ingredients.
Pour into the greased tin, dusted with flour.
Tap the tin couple of times so that the bubbles settle down.
Bake at 180C for about 25-30 min or until a toothpick inserted comes out clean.

For the ganache:
225gm dark chocolate
140ml heavy cream
Chocolate sprinkles

Method:
Chop the chocolate into small pieces
pour cream into it and melt it either on a double boiler or in the microwave
Whisk it well until it blends well.
Cool it a little. Apply it on the cake and smooth it. The ganache will thicken as it cools down completely.
Decorate the cake with sprinkles.

Notes:
1. Pour the sugar and oil into the mixture slowly and continuously.
2. Move the mixer in one direction only lest you let the air out from the batter.
3. Don't mix the flour in frantically. Gently cut and fold in circular motion.
4. Gluten will start forming if you over mix.

Happy Baking!

Monday, July 29, 2013

Daring Baker Challenge | Challah Y'all!

In a "celebration" of past Daring Baker and Daring Cook challenges, Lisa challenged all of us to search through the Daring Kitchen archives and pick any one we'd like! The REAL challenge was picking which delicious recipe(s) to try!

And guess what  I tried making...

This beauty called Challah!

Challah is a bread of celebration in Jewish tradition. At a time when white flour was considered a luxury, its use was reserved for either the wealthy or for festive events. In Judaism, the Sabbath is a weekly holiday and therefore is a festive occasion. It was around the 15th century when Jews in parts of Austria and Germany adopted an oval braided loaf from their neighbors to make the Sabbath special. These fancy shaped loaves made with white flour were seen as a fitting way to honor the Shabbat (Sabbath), symbolized in Jewish culture as a queen, therefore deserving of the finest one can achieve. In honoring the Sabbath as a day of rest, two loaves are traditionally put on the table. This is generally seen as a representation of the double portion of manna provided to the Children of Israel on Fridays during their wandering in the desert after fleeing from Egypt. This double portion allowed them to maintain the commandment to not do “work” on the Sabbath.

Ok, enough history and general knowledge. When the daring baker challenge was revealed I was so excited with the choice available for this month. I then quickly picked this bread challenge because I was planning to bake bread for a long time and somehow wasn't finding time to do that. I decided to take half the measurements in the recipe given. Didn't want to churn out huge loaves of Challah that no one wanted to eat you know! So decided to play safe and started the process just to find out that the yeast had expired. After 3 iterations, I just chucked it (almost half kg :-( ) and bought new yeast from the nearest supermarket and got cracking.
Before Proofing
After Proofing
Yummy crusty Challah
Easy Challah Recipe
(from templedavid.org)

Ingredients
4 cups (360 gm) all-purpose (plain) flour
1 cup (240 ml) warm water
1 package (2¼ teaspoons) package rapid rise yeast
½ (115 gm) cup sugar
2 large eggs
1 tsp. (6 gm) salt
1 egg beaten with 1 tsp. water

Directions:
1. Measure flour, sugar, and salt into a large mixing bowl.
2. In a separate bowl (or in the bowl of your stand mixer) combine water and yeast, allow to sit 5 minutes until foamy.
3. Add 1 ½ cups of the flour mixture to the water and yeast mixture, beat until well combined. Cover with a dishtowel, let stand 30 min.
4. Add two eggs to the dough, beat again.
5. By hand or with your dough hook knead in the remaining flour mixture. Knead approximately 10 minutes.
6. Transfer to an oiled bowl, cover, let rise one hour.
7. Punch down dough, knead approximately 3 minutes.
8. Divide dough in two. Shape each half as desired (3, 4, or 6 strand braid).
9. Place loaves on parchment covered or greased cookie sheets, cover with a towel, allow to rise one hour.
10. Preheat oven to 400 degrees.
11. Brush loaves with egg wash.
12. Bake at 400 degrees for 10 minutes. Reduce oven temperature to 375 degrees, bake until golden crust forms (about 25-30 minutes).
13. Transfer to a wire rack to cool. 

Sunday, July 14, 2013

Whole Wheat Plum Mini Cakes

I bought some plums the other day. Looked like they weren't ripe yet. The one I bit into was tart. I waited for 4 days to bake with it. I wanted to make something delicious but healthy at the same time. So imagine my pleasure when I came across a whole wheat plum cake recipe. Well, in no time, the plums were pitted, chopped and I was ready to bake my first plum cake.

I have made cakes with plain white sugar so far. I have used demerrera sugar in cookies but not in cakes. So, it was interesting that whole wheat coupled with demerrera came out surprisingly tasty. I hadn't expected the punch of flavour and texture from a wheat cake.. what's more, the plums were so tart that it it hits you when you bite into the rich flavoured cake. Maybe it is a good idea to chop them into smaller pieces next time.

While serving it is a good idea to heat the cake and serve it with vanilla ice cream. Yum combination!

Whole Wheat Plum Mini Cakes Recipe

Ingredients:
  • 100g butter, room temperature,
  • 100g brown sugar
  • 2 eggs
  • 1 tsp pure vanilla extract
  • 4-5 drops almond extract
  • 1/2 cup whole wheat flour
  • 50g almond meal
  • 3/4 tsp baking soda
  • 50ml buttermilk
  • 5-6 plums, halved
  • Low fat cream or ice cream to serve
Method:
  1. Preheat the oven to 190C. Lightly grease  10-12 individual muffin tins, or ramekins.
  2. Beat butter and brown sugar until light and mousse like.
  3. Add eggs, vanilla extract and almond extract and beat again.
  4. On low-speed add both flours and baking soda and mix.
  5. Fold in the buttermilk.
  6. Divide batter between prepared tins. Top each with half a pitted plum, cut side up.
  7. Place on a baking sheet and bake at 190C for about 35 minutes / until done.
  8. Leave to cool in tins.
  9. Loosen edges with a butter knife and turn out on serving platter. Serve with a drizzle of low at cream or vanilla ice cream.

Sunday, June 30, 2013

Daring Bakers Challenge | Life of Pie - Classic Apple Pie

 Rachael from pizzarossa was our lovely June 2013 Daring Bakers’ host and she had us whipping up delicious pies in our kitchens! Cream pies, fruit pies, chocolate pies, even crack pies! There’s nothing like pie! :)

Ingredients   
3 to 4 medium cooking apples
110 grams Cooking margarine /butter   
220 grams Plain flour
90 grams Normal sugar (amount depends on how sweet the apples are)   

Cooking Method


First, you need to make the pastry which will form the base and the top of the apple pie. 
Put the margarine/butter in a mixing bowl and pour in the flour.
Mix it all together with your hands until you have a crumbly texture.
This stage should only take a minute or so but it's one of the joys of making apple pie.   
Add 3 tablespoons of cold  water to the pastry and mix it. Then use your hands to mould the pastry mix into a ball (see picture). You can tell the mix is correct because the pastry ball will collect all the bits of pastry from the edge of the bowl leaving it almost clean!
Wrap the pastry ball in cling film and put it in the fridge to 'rest' for half an hour.
 
After half an hour, take the pastry from the fridge, and separate roughly two thirds of it. Roll the pastry out with a rolling pin so that it is large enough to line the base and sides of the pie dish. Use several sprinklings of flour on the rolling pin and the surface used for rolling the pastry.
Put the dish over the rolled pastry to make sure it is about the correct size (see picture).   
Now for a slightly complicated bit,
The idea is to pick up the rolled out pastry and put it in the dish to form the base of the apple pie.
First, lightly roll 50% or so of the flattened pastry over the rolling pin. Then support the rest with your hand and transfer it to top of the  dish.
Gently ease into the base of the  dish and firm it round the sides.   

If the pastry does break at all, it's not a disaster, just do your best to cover the base and sides. 
Then trim off the excess pastry from the top. Do this with the 'blunt' side of a knife - the blunt side is far less likely to tear the pastry.  
Turn your oven on now so that it's pre-heated ready to cook later on. Heat settings are 220°C / 425°F.
 
Now is the time to peel the cooking apples, cut them into quarters and then slice them. See the picture on the right for how fine to slice the apples.
Each quarter should produce roughly 8 to 10 slices. Accuracy is not so important. The thicker the slices, the more firm the apple mixture will be when it has been cooked.   

Place the apple slices into the pie bowl on top of the base pastry. 
Do this in three layers, scattering a one third of the sugar on each layer.
Using water and a pastry brush (or your wet fingers) dampen the top edge of the pastry. This will help the top pastry to attach firmly to it better.      
Take the remaining third of the pastry and roll it out with the rolling pin into a circle that is a little bit bigger than the top of the dish.
Transfer the rolled out pastry to the top of the pie using the rolling pin in the same way described for the base pastry.
Tuck the pastry down at the edge and remove the excess pastry using the blunt edge of a knife (see first picture which can be enlarged by clicking on it).
Using both hands, 'crimp' the pastry round the edge of the pie to obtain an attractive finish - enlarge photos 2 and 3 to see more clearly how we did it. 
Finally make 2 holes in the top of the pastry (see picture 3) to allow the steam to come out during cooking and prevent the top going soggy.
Lightly brush the top with a little milk to give it a light brown colour when cooked.
 
Put the apple pie in the pre-heated oven (220°C / 425°F) and leave it cooking at that temperature for 10 minutes. Then turn down the heat to 190C / 375F and cook for a further 40 minutes.
When it is cooked, leave to cool for at least 15 minutes before serving
Beware, apple pie can stay really hot for an hour or so.
Serve hot or cold with ice cream, cream or custard.

Sunday, April 28, 2013

Daring Baker Challenge | Savarin

Tell me what you eat, and I will tell you what you are
- Brillat-Savarin

Every last day of the month, I eagerly wait for one thing. No, not for my salary, silly! For the first of the month to begin so I can find out the month's Daring Baker challenge. This time it was Savarin. Wow, one more new thing to learn and savour.. I was excited.

Natalia of Gatti Fili e Farina challenges us to make a traditional Savarin, complete with soaking syrup and cream filling! We were to follow the Savarin recipe but were allowed to be creative with the soaking syrup and filling, allowing us to come up with some very delicious cakes!
 
Savarin is a French cake named after Brillat-Savarin, the famous 18th century gastronome and writer. It is a light ring-shaped cake made with yeast and soaked in liqueur-flavored syrup. The syrup usually includes some type of alcohol, often rum. I soaked my savarin with vanilla caramel flavoured syrup and left it in fridge for a couple of days. I thought it might turn out a bit eggy, but it was delicious! I could have added some more syrup though..

Oh! and I was itching to bake my new fluted 12-cup silicon bundt pan. The savarin didn't stick to the silicon pan. Cleaning up was a breeze. After labouring for hours on the savarin, this was a welcome change.

Savarin Recipe

Ingredients
2½ cups (350 gm) bread flour
2 tablespoons (30 ml) water, lukewarm
6 (320 gm) large eggs at room temperature, separated
1½ teaspoons (4 gm) instant yeast or 15gm fresh yeast
4 teaspoons (20 ml) (20 gm) sugar
1/3 cup (75 gm) butter at room temperature
1 tablespoon (15 ml) (15 gm) orange and lemon zest (optional)
1 teaspoon (6 gm) salt
¼ cup (55 gm) butter for greasing the work surface, hands, dough scraper & baking pan

Directions:
Sponge

In a small bowl mix 2 tablespoons (30 ml) lukewarm water, 3 tablespoons (25 gm) flour and yeast , cover with cling film and let rise 60 minutes.

Dough
1. After 30 minutes put the egg whites in the mixer bowl and start working with the paddle at low speed adding flour until you have a soft dough that sticks to the bowl (about 2 cups or 270gm) and work until it comes together , cover with cling film and let rest 30 min
2. Add the sponge to the mixer bowl along with a tablespoon of flour and start mixing at lowspeed (if you wish to add the zests do it now)
3. When it starts pulling away from the sides of the bowl add one yolk and as soon as the yolk is absorbed add one tablespoon of flour
4. Add the second yolk , the sugar and as soon as the yolk is absorbed add one tablespoon of flour
5. Raise the speed a little
6. Add the third yolk and the salt and as soon as the yolk is absorbed add one tablespoon of flour
7. Keep on adding one yolk at the time and the flour saving a tablespoon of flour for later
8. Mix the dough until is elastic and makes “threads”
9. Add the butter at room temperature and as soon as the butter is adsorbed add the last tablespoon of flour
10. Keep on mixing till the dough passes the “window pane test”
11. Cover the dough with cling film and let it proof until it has tripled in volume (2 to 3 hours)
12. You can prepare the Pastry cream now if you chose to use it, and refrigerate it
13. While you wait prepare your baking pan buttering it very carefully not leaving too much butter on it
14. Grease your dough scraper, your hands and your work surface and put the dough on it and fold with the Dough Package Fold two or three times around (5 folds twice or three times). Cover with cling foil and let it rest 15 minutes on the counter
15.Turn the dough upside down and with the help of your buttered dough scraper shape your dough in a rounded bun
16. Make a hole in the center with your thumb and put it in the prepared pan
17. Cover with cling film and let rise in a warm spot until the dough reaches the top of the pan(about 1 hour)
18. Pre-heat oven to moderate 340°F/170°C.
19. Bake the Savarin for about 40 minutes until the top is golden brown
20. Meanwhile prepare the Syrup
21. When the Savarin is done take it out of the oven and let it cool.
22. You have two choices now : you can immerse it in syrup right now or you can let it dry out (so
it will lose some of his moisture that will be replaced by the syrup) and soak it later on.
23. To immerse it in syrup it is a good idea to place it in the mold you baked it in (I’m afraid a spring- form one wouldn’t work for this) and keep adding ladles of syrup until you see it along the rim of the pan. Or you can just soak it in a big bowl keeping your ladle on top of it so it doesn’t float.

Caramel Vanilla Flavored Syrup:
Servings: 1 savarin
Ingredients

1½ cups (350 ml) water
½ cup caramel flavour
1 cup (240 ml) (125 gm) sugar
one cinnamon stick
2 tsp pure vanilla extract
Directions:
1. Combine water, sugar and cinnamon stick and bring to a boil.
2. Let boil 5 minutes and remove from the stove. Add vanilla extract, add caramel flavour.
3. When cooled a bit, pour it over the savarin.

Tuesday, April 16, 2013

Rainbow Cake

Even before I had taken my baking basics classes last year, I had come across the rainbow cake recipe. Once I learnt the basics, the next step was to source the colours. I was told that the powdered colours are not safe and I couldn't find liquid colours in the near-by Nilgiris outlets. So, I had to wait until my cousin Nayana got me a set of Wilton Gel Colours from Canada December last year. I gingerly opened pink to colour my Strawberry cake frosting but didn't dare to attempt the rainbow cake until last week.


I made the rainbow cake and it was a huge success. It was gone in a day. Meant that it was THAT good. My cousin was visiting Bangalore with his kids. There was some free time on Saturday hence I started making choco chip cookies. The nephew wanted to know when I was going to make a cake. And he wanted to know what I was doing at each step. So I obliged. Made a second batch of rainbow cake and it too was very much appreciated.


Next in list is this cake for me. Have to try it soon. :-)

Rainbow Cake Recipe
Adapted from Monika's Blog 

Ingredients:
For the cake:
3/4 cup butter (at room temperature)
1 cup sugar
1 1/2 cup flour
1 tsp baking powder
3 eggs
3 tbsp milk
1 tsp vanilla
Pinch each of violet, blue, green, yellow, orange and red

For Frosting:
1/2 cup Non-dairy whipping cream
pinch of colour - Any

Method:
  • Preheat your oven to 190C and prepare your 6-inch pan by lightly greasing it with butter and keep aside.
  • Beat the butter and sugar together till light and fluffy, this will take about 2-3 minutes
  • Now beat in one egg at a time, adding a little flour if your egg shows signs of curdling
  • Add the milk, vanilla essence and rest of the flour and mix till just blended
  • Divide the batter equally in six bowls
  • Add a small pinch of each gel color into each bowl and mix properly. If using liquid colors, use 1tsp each.
  • Take six tbsp measures or 6 equal measure spoons and starting with violet, keep pouring one spoonful of each color in the center of the baking pan. Let the batter spread by itself, when u pour spoon after spoon it will start forming layers
  • When you have finished pouring the batter, give the bowl couple of gentle taps on the kitchen counter to let go of any large air bubbles and bake in the preheated oven for about 25-30 minutes or till the tooth pick comes out clean and the top of the cake bounces back when pressed
  • Let it cool completely before frosting.
Frosting:
  • Chill the bowl and the blades in freezer for 15-20 minutes. 
  • Pour the whipping cream, add the icing color and whip it for 3-4 minutes until medium peaks. 
  • Coat the cake with the icing. Chill the cake in refrigerator after the first coat for 15min. 
  • Apply the second coat and decorate the cake with sprinkles on top.

Friday, April 12, 2013

Mocha Choco Vanilla Cake

I met Sonya when I took classes from Monika last June. She was apprenticing withe Monika at the time. During our lunch break, we got talking and she happened to mention Joy the Baker. Oh, I am so happy she did.. I liked Joy's blog and was going through her posts and this post caught my eye. It was a recipe for a coffee cake. I mean cake for coffee time. I don't know what particularly interested me. Maybe the fact that it had vanilla, coffee and chocolate flavours in just one cake.


I bookmarked it and kept on hoping I would get to make it soon. It was the first time I was going off the reserve and picking up a recipe from an unknown blog. Will it be a hit or a miss?  Questions, questions and some more questions later I made up my mind and took to the job. And guess what, it was super duper deli-cious! I have made the eggless version in Eggless Chocolate and Vanilla Cake with Black Currants and taste-wise it is pretty close to the recipe I am going to share with you now.


If you think I am exaggerating about the super duper deliciousness, hear this. The day I made this cake for the first time, I was visiting my good friend Kanchan, who is my only I-don't-like-sweets AND I-don't-eat-sweets friend. I gingerly cut three slices for her and her family and took it to her. Guess what, she had 2 slices and wanted more! Kanchan asking for more cake was so unthinkable; she made me so happy that I promised her more and went back with the slices you see below. (Yes, she finished half of it ;-) ) 

Now I have made these so many times, for self & family and on order for friends that this is my most favourite recipe so far.


Mocha Choco Vanilla Cake Recipe
Adapted from Joy the Baker

2 cups all-purpose flour
1 teaspoon baking powder
½ teaspoon baking soda
¼ teaspoon salt
¾ cup unsalted butter, softened
1 cup granulated sugar
2 large eggs
2 teaspoons vanilla extract
1 cup curd (Original recipe asked for sour cream. I just used home made curd)
2 Tablespoons cocoa powder dissolved in 1½  Tablespoons hot water
2 Tablespoons instant espresso powder dissolved in 1 Tablespoon hot water 

  • Put a rack in the middle of the oven and preheat to 180 degrees C.  Generously butter and flour an 8- inch pan.
  • Whisk together flour, baking powder, baking soda and salt in a bowl.
  • Combine butter and sugar in a large bowl and beat with an electric mixer at medium speed until pale and fluffy, about 2 minutes. Add eggs one at a time, beating well after each addition, then beat in the vanilla. Add flour mixture alternately with the sour cream, beginning and ending with flour mixture and mixing until just incorporated.
  • Transfer about one third of the batter to a small bowl. Add espresso mixture and stir until combined. Transfer 1/3 of the remaining vanilla batter to another small bowl and add the cocoa mixture and stir until combined. Spoon all three batters into the pan, alternating so each flavor is distributed through the pan.
  • Bake until cake is golden or until a wooden spoon inserted in the center comes out clean, 55 to 60 minutes. Cool in pan on a rack for 30 minutes, then invert onto a rack to cool completely.

Monday, April 1, 2013

Daring Baker Challenge | Chocolate Beetroot Cake with Orange Chocolate Frosting | Hidden Veggies


I HATE beetroots. This is the only one vegetable that doesn't feature in any of the dishes at home. Because all of us except mom went to hostels at some time in our lives, me being in a hostel the longest, we have had more than our fair share of beetroots. Don't mistake me. It tastes good when prepared well. I agree. Because mom has seen our collective grimaces over time, it is inconspicuously absent from our lives and we couldn't be happier.

Then March's Daring Bakers happened. Ruth from Makey-Cakey was our March 2013 Daring Bakers’ challenge host. She encouraged us all to get experimental in the kitchen and sneak some hidden veggies into our baking, with surprising and delicious results!

Guess what I wanted to use for the theme. Yes, you figured it out. BEET.

But this one was beyond my imagination. Chocolate and beetroot make for an amazing combination. This cake was moist and sticky. I had a block of orange flavoured chocolate handy. So instead of the traditional chocolate ganache, I made the orange chocolate ganache and it complemented the cake so well that I couldn't stop with just one.. And I asked everyone who tasted it to guess what was in it. Chocolate was easy to guess, but beet was a pleasant surprise for everyone. When people want second helping, you know you have a winner of a recipe! And when your one year plus old niece fights with her mom for more, you are mighty pleased!!

If you think I am fooling you (after all, today is April Fool's Day, right?), let me put your mind at ease. See it for yourself..

Hah, now that you are sure that I REALLY added beetroots to the cake, shall we see the recipe?


I am in love with the colour of the frosting. Couldn't resist posting one more pretty pic! Now the recipe. I promise.

Chocolate Beetroot Cake with Orange Chocolate Frosting Recipe:

Ingredients:

Chocolate beetroot Cake
200g vanilla sugar
125g neutral oil
2 eggs
 1 tsp pure vanilla extract
120g plain flour
 1/2 tsp baking soda
 1/2 tsp baking powder
35g cup cocoa
 1/2 tsp salt
 125g peeled and grated raw beetroot
 75g dark chocolate chips

 Chocolate Ganache Topping                     
 100g orange flavoured chocolate (You can use dark chocolate or semi sweet chocolate as well)
100g low fat cream

Method:
1.    Preheat the oven to 180ÂșC. Line the base and sides of a 7″ round baking tin.
2.    Place the sugar, oil, eggs and vanilla extract in a large bowl and whisk well with a balloon whisk.
3.    Sift the dry ingredients together.
4.    Mix the grated beetroot and chocolate chips.
5.    Alternatively add the flour mix and grated beetroot in 3 lots.
6.    Mix together lightly and place in the tin. Bake for an hour/ until a tester comes out clean.

 Chocolate Ganache Topping
Place the orange flavoured chocolate, cream in a heat proof bowl. Microwave 1 minute at a time until
the chocolate has melted, stirring well each time. Whisk until glossy and cool a little. Pour over the
cake.

Wednesday, March 20, 2013

Banana Cupcakes with Double Chocolate Chips


I will let you in on a secret.. I am not a great sweet fan. No, don't look at me like that. errrr.... I mean, I like certain sweets but not all. I am very picky. So, when came across this recipe, I wasn't too sure how it would turn out.. So I took out all my baking paraphernalia and took to baking it with a gusto. The first time, however, I somehow doubled the milk quantity in my excitement and realised it once I had added all the milk into the batter. Awwww, how is it that you realise the moment you make a ghastly mistake, not a second before! Hmm.. let me think about it for a bit! Okay, the taste was great, but the muffins were bit on the softer side.. I didn't like them much.


Two weeks back, I was wondering what recipe to try next and realised we had extra bananas at home. And a plan was made. How could I be content with an (almost) failed attempt? Right? And this time, they did come out perfect. You bite into the muffins and could feel the goodness of chocolate, delicate aroma of bananas tempting your olfactory senses and seducing them with its mellow, sweet taste.. And I was a fan.


My sister likes banana walnut cakes. Though I had made healthy banana walnut loaf for her before, I will make banana walnut cupcakes with loads of chocolate chips in it. Slather it with some yummy nutella and I guarantee you that you will find yourself in heaven! 


Banana Cupcakes with Double Chocolate Chips
The batter yields 6 large cupcakes and 3 mini loaves
Adapted from Shaheen's PurpleFoodie

1/2 cup / 100g butter
1 ¼ cups / 250g sugar
2 eggs 
1 tsp vanilla extract 
1 cup / 225g bananas, mashed 
½ cup / 100 ml warm milk 
2 cups / 250g all-purpose flour 
1 tsp baking powder 
¾ tsp baking soda 
½ teaspoon salt 
¼ cup / 50g Dark chocolate chips 
¼ cup / 50g White chocolate chips

Method:
1.    Preheat oven to 175°C / 350°F.
2.    Cream together the butter and sugar.
3.    Add the eggs, vanilla, mashed bananas.
4.    Sift together the flour, baking powder, baking soda and salt.
5.    Add flour and milk in the following order: 1/3rd flour, ½ the milk, 1/3rd flour, rest half of the milk and finally the remaining 1/3rd flour till well combined.
6.    Stir in the chocolate chips and reserve some for the top.
7.    Bake for 20-25 (when using mini loaf pan or large cupcake mould, else reduce the time and check with wooden skewer) minutes or until a wooden skewer comes out clean.


Sunday, March 10, 2013

Coffee Panna Cotta | Dessert


Panna Cotta is an Italian desert of cooked cream. Coffee is a delicious flavour and you will fall in love with this dessert. The recipe is simple and the dessert so flavoursome that you will surely ask for more. The other flavour you can try is Saffron Caramel Panna Cotta.


I have heard people raving about the awesomeness of coffee flavour but hadn't quite understood until I made cakes and desserts at home. The delicate flavour and the smell just blew my mind away. Now, I am a convert.

This dessert took me hardly 15minutes to prepare, but couldn't resist opening my refrigerator again and again to check if it had set... Oh, the pleasure of digging into this delicious creation was just out of this world. Hey, don't just take my word for it. Try it for yourself and then tell me!


Coffee Panna Cotta Recipe
Adapted from Passionate About Baking


Prep Time: 5 minutes
Total Time: 30 minutes  {plus chilling}
Ingredients:
  • 1ltr low fat cream, room temp
  • 115g vanilla sugar
  • 2.5 tbsp coffee powder
  • 2 tsp gelatin
  • 3 tbsp water
Method:
1.     Sprinkle gelatin over cold water and let stand for five minutes.
2.     Stir coffee into 30ml cream.
3.     Place the cream, coffee mix and sugar in a heavy bottom pan and gently bring to a simmer, but not a full boil. Stir often.
4.     Take off heat. Add 1-2 tbsp of this hot cream to the dissolved gelatin to loosen it further, and then pour the gelatin mix back into the hot cream through a sieve. Stir well.
5.     Let the mixture stand for about 10 minutes, then distribute among your serving bowls/molds/ramekins/goblets.
6.     Allow to set for 6-8 hours/preferably overnight. Serve with chocolate shavings or chocolate ganache.