Wednesday, February 27, 2013

Daring Baker Challenge | Crisp Crackers

As part of daring bakers challenge, I made healthy whole-wheat crackers. Turned out very good. It was the first time I had attempted crisp crackers. Now, instead of buying multigrain crackers, I can make them right at home.

The original recipe mentions 280 gms of plain all purpose flour. I used whole wheat flour (atta) and all purpose flour in equal measure to make it healthy. You can use rye (raagi) as well instead of whole wheat flour.

These crisp crackers are perfect snacks with your evening tea. The mild aroma of pureed onion lends a subtle hint of the onions in taste and a great smell too. The original recipe uses 2tbsp of poppy seeds (gasagase, khous khous) as well. I didn't have any at home, so just left it out. 


Healthy whole wheat and Onion Crackers
Minimally adapted from “Menus from an Orchard Table” by Heidi Noble featured
on Sarah’s blog.
Ingredients:
1 medium onion
1 large egg
1/3 cup (80 ml) vegetable oil
2 teaspoons (12 gm) salt
2 cups (280 gm) all-purpose (plain) flour (I used 1 cup whole wheat flour and 1 cup all purpose flour)
1 teaspoon baking powder
1 tablespoon granulated sugar
1/4 teaspoon freshly ground black pepper

Directions:
In the bowl of a food processor fitted with the blade attachment, puree the onion. One medium onion will yield approximately 1 cup puree. Measure 1 cup puree and liquid from the onion and return to the food processor. Add the egg, oil and salt and blend until well incorporated.
In another bowl, measure the dry ingredients. Mix lightly to combine. Make a well in the center and add the liquids in this well. Mix in one direction until the dough is fully combined. Lightly knead the dough, flouring as needed, for 2 minutes. Wrap tightly in plastic wrap and rest in the refrigerator for 1 hour.
Preheat oven to moderate 350°F/180°C.
This is a very soft dough and you may find it best to roll it between two sheets of parchment paper.
Roll as thinly as possible. In fact, it is best if rolled as thinly as a strudel dough. But don't worry if you can't get it that thin. The crackers will still be fine. Cut into desired shapes.
Bake until evenly golden. The time required will depend upon thickness but anywhere from 5 - 15 minutes. If they are thicker, the crackers will puff up like little pitas. Cool thoroughly before storing in air tight container.

Sarah from All Our Fingers in the Pie was our February 2013 Daring Bakers’ host and she challenges
us to use our creativity in making our own Crisp Flatbreads and Crackers! 

Thursday, February 21, 2013

Eggless Chocolate and Vanilla Cake with Black Currants


I became a member of Foodie group in FB and this was my first post in the group. Some have asked me for the recipe and so the post. 

I have a long list of to do cakes in my bookmarks. When I want to try a new cake, I feel so confused because there are so many to choose from. I had tried a Mocha choco vanilla marble a while back, which I have not posted here yet. The taste was amazing, so much so that a friend who doen't like sweets and sister who doesn't like chocolate cake (imagine that!!) lapped up the pieces and asked for more. And this time I found a similar recipe sans the coffee. This recipe was an eggless cake recipe and I wanted to see how it would turn out. I made a layer of chocolate sandwiched between vanilla, but one could do a coffee layer too or perhaps all the three together one on top of the other. THAT would be really exciting!

Layering in progress
Even mom was excited about the eggless cake recipe. She oversaw the entire process and as always she helped me scrape the vessel to make sure that there was no more batter left. I am being extremely careful now because dad always complains that I waste a ton-full of batter. Duh! How much ever I try, I leave some batter on the side of the vessel. So that's where mom's 30+ years' of expertise comes handy :-D
Batter ready to go into oven
Oh, the black specs that you see in the above picture is scraped vanilla. Yes! Fresh vanilla beans.  I have a bunch of fresh vanilla pods that my cousin Sushma got for me from Coorg some time back. I have used them in my bakes but I was not sure if the flavour is enough from half a vanilla bean. Hence, just to be sure, I added the vanilla essence as well.


Now that I have treated you with the pictures, without further ado, here is the recipe.
Eggless Chocolate and Vanilla Cake with Black Currants
Adapted from Passionate About Baking
1 1/2 cups all-purpose flour, sieved
1 cup yogurt
3/4 cup vanilla sugar
1/2 tsp baking soda
1 1/4 tsp baking powder
1/2 cup unsalted butter, melted (or oil) (I used 1/4 cup butter +1/4 cup oil)
1/2 vanilla bean (optional)
1/2 cup dried black currants (optional)
1 heaped tbsp cocoa 
Method:
Preheat oven to 200 C for 10 minutes. Grease a 6″ round tin, and line the bottom.
Beat the vanilla sugar, scraped vanilla bean and yogurt for 5 minutes on high speed. Add baking powder and baking soda, beat in on low, and allow to stand for 3 minutes. You will find that bubbles appear.
Beat in the melted butter and vanilla essence. Next, slowly add the flour in 4 lots, blending in well after each addition.
Take 1/3 of the dough in a separate bowl and stir in the cocoa. (You can make just vanilla as well, in which case, omit this step)
Add 1/2 the vanilla batter to the bottom of the tin, smooth it out to spread across the whole surface. Add all the chocolate batter, and smoothen it out too. It might be pretty thick, as mine was. Top with the remaining vanilla batter to make a third layer. Top with dried black currants if using.
Bake at 200C for 10 minutes, reduce temperature to 175C and bake for 40-45 minutes or till a toothpick inserted into the cake comes out clean. (PAB's recipe said 40-45min, I was using an 8" tin, so it took me 30-35min).
Cool the cake for 20-30 minutes and then overturn onto a plate. Let the cake cool completely before slicing. The cake will taste good the next day too.

Friday, February 15, 2013

Saffron Caramel Panna Cotta | Dessert


I had bought a one ltr pack of Amul Cream and was waiting for the right time to make Panna Cotta. I knew that once I opened the pack, I had to finish it at one go so chose two panna cotta recipes. We always eagerly look forward to my sister and nephew's visit. Mom starts preparing special dishes for her grandson and I start planning what new recipe to try. This Panna Cotta was a perfect choice.


I was making caramel for the first time. Was excited to see how it would turn out. It was delicious along with the creamy saffron panna cotta. The recipe uses saffron extract. I only had saffron, hence used it directly with sugar and cream. For next time I would cut the saffron into small pieces and mix with the cream/sugar because this time, I got strands of saffron in the cream/sugar.Wasn't bad but smaller pieces would infuse better into the cream. I halved the quantity in the recipe and used the other half to make coffee panna cotta. The recipe in another post.

Saffron Caramel Panna Cotta Recipe:
(Adapted from Passionate About Baking)


Prep Time: 20 minutes
Total Time: 30 minutes plus setting time


Ingredients:
  • Saffron caramel
  • 75gm granulated sugar
  • 1-2gm saffron extract {knife tip full}
  • Saffron Panna Cotta
  • 2tsp gelatin powder
  • 3 tbsp cold water
  • 1ltr low fat cream {18% fat}
  • 110gm vanilla sugar {or plain}
  • 1/8 tsp saffron extract {plus a teeny bit more for topping}
  • Pistachios, rose petals to garnish
Method:
  1. Saffron caramel
  2. Keep the serving molds/ramekins ready.
  3. Place sugar and 1/8 tsp of saffron extract in heavy bottom pan and melt the sugar to a light caramel. Do not let it burn or it will gte bitter. Swirl the pan often and take off the minute all the sugar has melted. It should be a bright orange colour.
  4. Immediately spoon about a heaping tsp into each mold/ramekin, swirling it about to distribute it.Continue for all the molds. Do this pretty fast as the caramel will harden rapidly. Just in case it hardens before you are  place the pan over very low heat to melt again.
  5. Saffron Panna Cotta
  6. Sprinkle gelatin over cold water and let stand for five minutes.
  7. Place the cream, saffron and sugar in a heavy bottom pan and gently bring to a simmer, but not a full boil. Stir often.
  8. Take off heat. Add 1-2 tbsp of this hot cream to the dissolved gelatin to loosen it further, and then pour the gelatin mix back into the hot cream through a sieve. Stir well.
  9. Let the mixture stand for about 10 minutes, reserve about 100ml {optional}, and distribute the rest among your serving bowls/molds/ramekins/goblets.
  10. Leave to set for about 1-2 hours, then add a tbsp of the deeper saffron cream over the tops. Allow to set for another 6-8 hours/preferably overnight.
  11. Demold loosening the sides with a blunt knife and serve with a sprinkling of pistachio nuts and edible dried rose petals if you like.


Thursday, February 7, 2013

Daring Bakers Challenge | Gevulde Speculaas from scratch

Francijn of Koken in de Brouwerij was our January 2013 Daring Bakers’ Hostess and she challenged us to make the traditional Dutch pastry, Gevulde Speculaas from scratch! That includes making our own spice mix, almond paste and dough! Delicious!

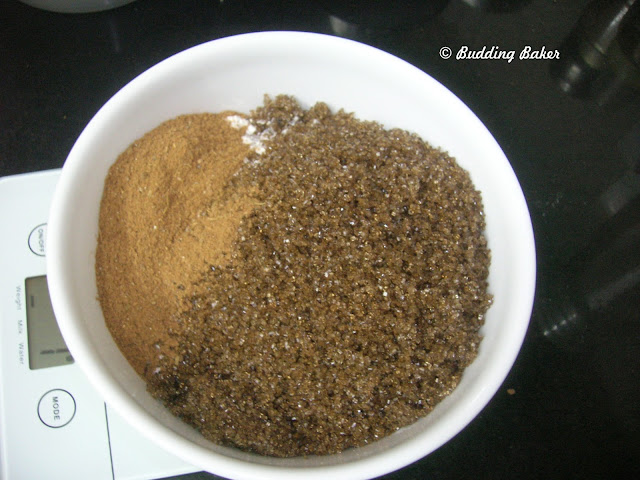
The sepculaas spice required mixing of some exotic spices so aromatic that the overwhelming smell of raw spices itself filled the house. The speculaas spice mandatorily includes cinnamon, ground cloves, mace and ginger and white pepper,cardamom, coriander,anise, nutmeg are the optional spices. Wow, so many spices in one place? I had never heard of mace before and never used nutmeg before in my baking. I found nutmeg (Jaai kaai in Kannada) near my place but it was exciting to figure out which place could be selling mace (jaa patre in Kannada) and I got it in a small store in Jayanagar 9th block. Ooh, it was heady stuff indeed.

I assembled all the spices, even the optional ones, and then ground them each one by one and finally made the spice mix. The final spice mix looked like this:

The recipe for speculaas dough indicated that the dough had to be made in advance and chilled before use. The dough gets better over time so I chilled for a week and made the almond paste just the day before. The dough was too crumbly for me to roll, maybe because I thawed it for a while. So I just patted the dough onto the baking tray and followed the rest of the recipe.
Speculaas Dough Ingredients

Speculaas Dough
Perhaps I should have basted less on the top of the speculaas, because the top browned more than I had expected. But the smell that wafted through the house while this pastry got baked was other-wordly and we could not wait to taste it!


Speculaas Spice:

Mandatory:
cinnamon 40 to 60 % of the total amount
ground cloves 1 or 2 parts
mace ½ or 1 part
ginger ½ or 1 part
Optional:
white pepper ½ or 1 part
cardamom ½ or 1 part
coriander ½ or 1 part
anise ½ or 1 part
nutmeg 1 or 2 parts
A convenient way to mix the spices is as follows:
Take at least 1 or 2 teaspoons of ground cloves, ½ or 1 teaspoon of mace and ½ or 1 teaspoon of ginger.
Add to taste ½ or 1 teaspoon of white pepper, ½ or 1 teaspoon of cardamom, ½ or 1 teaspoon of coriander, ½ or 1 teaspoon of anise, and 1 or 2 teaspoons of nutmeg.
Measure or weigh the amount of spices you have now, and add an equal amount of cinnamon.

This method yields at least 4 and at most 18 teaspoons of spices, so if you plan to mix just a few spices, use bigger or more spoons to get a reasonable amount.
Take your time to smell the ingredients individually before you decide how much to add.
Store the spices airtight, dry and dark, they will not spoil for a long time.


Almond Paste:
Ingredients:
7/8 cup (125 gm) raw almonds (or 1-1/3 cups (125 gm)  ground almonds)
5/8 cup (125 grams)  granulated sugar
1 large egg
1 teaspoon (3 gm) lemon zest

Directions:
If the raw almonds still have their brown skins, remove them as follows. Bring water to a boil, add the
almonds, cook them for one minute, drain immediately and let cool for a few minutes. Rub them between
your fingers to remove the skins.

Grind the almonds for one or two minutes in a food processor, until you see nothing but very small pieces.
(Or skip this step if you use ground almonds.)
Add the sugar, and grind for another one or two minutes. It must be very fine after this step.
Add the egg and let the food processor combine it - if it is powerful enough. Otherwise you will have to
combine it with your fingers.
Store the almond paste in an airtight container in the refrigerator. Although the flavor gets better as days
pass by, it is not wise to store the paste for too long, as it contains a raw egg. For the same reason you
should not eat the paste unbaked.


Speculaas Dough
Ingredients:
1¾ cups (250 gm) all purpose (plain) flour
1 teaspoon (5 gm) baking powder
¾ cup (150 grams) brown sugar, firmly packed
a pinch salt
2 tablespoons (15 gm) speculaas spices
3/4 cup (175 gm) unsalted butter

Directions:
Put flour, baking powder, sugar, salt and spices in a bowl.
Cut the butter in dices and add.
Knead until smooth.
Feel free to add a little milk if the dough is too dry.
Wrap in clingfoil and put in the refrigerator for two hours.
You can choose to make the dough a few days in advance, just like the almond paste, that will benefit the
flavor. Freezing is no problem.

Assembling and baking the Gevulde Speculaas
Ingredients:
speculaas dough
almond paste
whole almonds without skins for decoration
1 large egg
shallow baking pan, 8x10 inch (20x26 cm) or, round with of diameter 10 inch (26 cm)

Directions:
1. Grease the pan.
2. Preheat the oven to moderate 350°F/180°C.
3. Divide the dough into two portions.
4. Roll out both portions on a lightly floured surface, until they are exactly as big as the baking pan.
5. Put one of the layers in the pan and press it lightly to fill the bottom.
6. Lightly beat the egg with a teaspoon cold water.
7. Smear 1/3 of the egg over the dough in the pan.
8. Roll out the almond paste between two sheets of cling foil, until it is exactly as big as the pan, and
put it on the dough in the pan. (If you chose to make the paste soft, you can smear the paste instead
of rolling it.)
9. Press the paste lightly down to fit in the pan, and smear the next 1/3 of the egg over it.
10. Now put the second layer of dough on top of the paste, press it lightly, and make as smooth as
possible.
11. Smear the last 1/3 of the egg over the dough.
12. Decorate the pastry with the almonds.
13. Bake for 40 minutes in the preheated oven.
14. Let cool completely in the pan, then cut it in portions as you like.
15. If you wrap the stuffed speculaas in cling foil, after it has cooled completely, you can store it a few
days at room temperature.


Wednesday, January 30, 2013

Double Chocolate Muffins


These yummy muffins were the first set of beauties to come out of my brand new oven late last year. The oven was home delivered by Girias and my excitement knew no bounds. I patiently waited for a day, went through the product manual and admired the oven for an entire day. When I couldn't wait anymore, I thought 'what could be better than double chocolate muffins for the very first trial'. And thus started the process and in 20minutes flat, my whole house was smelling of chocolate.

The recipe is very easy to follow. All you need is the raw materials, mixing bowl, spatula and muffins tins. Of course, no need to mention the oven I hope. Easy, right?! 

So, here comes the recipe:

Double Chocolate Muffins Recipe 
Ingredients: 
1 3/4 cup of all purpose flour
2 tsp baking powder
1/2 tsp baking soda
2 tbsp best quality cocoa powder
3/4 cup superfine sugar
1/2 cup semi sweet chocolate chips, plus 1/8 cup for sprinkling.
1 cup milk
1/3 cup + 2tsp vegetable oil
1 egg
1 tsp pure vanilla extract

Method:
  • Put the flour, baking powder, baking soda, cocoa, sugar and 3/4 cup of chocolate chips into a large bowl and mix well.
  • Pour all the liquid ingredients into a measuring jug. Mix the dry and wet ingredients. together. Don't over mix it.
  • Spoon the batter into muffin cases.
  • Sprinkle the remaining 1/4 cup chocolate chips on top and bake at 180C for 20minutes or until the muffins are dark, risen and spring back when touched.

Notes:
1. Lumpy batter makes for the best cup cakes. Over mixing causes the muffins to be dry and tough.
2. I used chocolate shavings (just shave the chocolate slab with knife to get thin chocolate flecks) for topping as I was short of chocolate chips. 
3. If your oven is small, you can refrigerate the batter until the second batch is ready to go into the oven. The muffins still rise beautifully.


Monday, January 21, 2013

Nutella and Orange Rolls

Nutella and Orange Rolls are easy to make and yummy in taste. It is a yeast roll which are made with simple ingredients and the end result is spectacular. And the best part is that it is no-knead recipe. Yes, you heard it right!


I have got a couple of bread and rolls recipes in my kitty and have started making them one by one. Last week was my trial with Nutella and orange rolls. It is a simple recipe. Water, milk, sugar, yeast, orange zest and oil are combined with flour and the resulting dough mixture is left to rise. After the first rise, you roll it out  smear one side with Nutella, roll it and cut into pieces. The rolls are then left for second proofing and once the rolls have risen, they are baked and voila! your rolls are ready.

Here are some snaps for you to go though the process followed by the recipe:
Sugar and milk

Active Dry Yeast

Initial Dough Mixture

Rolls ready for the second rise

Rolls after second rise, ready to go into oven

Nutella and Orange Rolls

Nutella and Orange Rolls Recipe:
Ingredients:
Milk - 1 cup / 240 ml
Sugar - 1/4 cup / 50 grams
Vegetable Oil (or any flavorless oil) - 1/4 cup
Active dried yeast) - 1 1/4 teaspoon
All Purpose Flour - 260g (2 cups)  plus 33g (1/4 cup) Divided use
Baking powder - 1/4 teaspoon
Baking soda (scant, i.e, a little less than, just below the rim of the spoon) - 1/4 teaspoon
Salt - 3/4 teaspoon

Grated Orange zest - 3/4 teaspoon

For the filling: 
Nutella or any chocolate hazelnut spread - 3 tablespoons (alter to suit your taste)
Lightly toasted and chopped walnuts/ hazelnuts - 3 tablespoons ( optional but recommended)
  
Procedure: First things first -  Measure out all your ingredients and keep them ready.

  • Mix milk, sugar and vegetable oil in a pan, preferably one big enough to mix the dough in too, less cleanup later. Scald (heat until just before boiling) the mixture. Leave to cool for 45mins to an hour. The milk mixture must be lukewarm at the end of this period. In case you leave it for longer, just warm it till it's lukewarm.
  • When the mixture is lukewarm, add the active dry yeast, leave it for about 5-10 minutes till frothy. Whisk in the orange zest, make sure there are no clumps of it.
  • Then add 260 grams of flour to the mixture. Stir to mix with a spatula, you will get a batter that's quite sticky. Cover and let the batter sit for 1 hour or till double. Mine took an hour. It may take lesser time if its warmer.
  • Mix the 33 grams (1/4 cup) flour, baking powder, baking soda and salt. Add this to the flour mixture in the pan. Mix till everything comes together. It will still be very sticky. You could make the rolls straightway or refrigerate the dough. I would not attempt handling the sticky mass at this point of time. Chilling makes it easier to handle. So transfer it to a large box, close the lid loosely. The box must be large enough to allow the dough to more than double and still have some space left over.
  • When ready to make the rolls, before you even take the dough out of the fridge, get these things ready. Line your baking tin with parchment and grease the sides. Have your silicon brush, soft butter, rolling pin, sharp knife or dough scraper, extra flour ready. Flour your work surface with enough flour. This being a sticky dough, it would otherwise be impossible to roll out. If you take the dough out first and then spend time on this, your dough will lose the firmness and will not be as easy to handle.
  • Roll out the dough into a rectangular shape of 17'' x 11''rectangle aprox. This will be quite thin. Dust the dough and work surface with flour when necessary.
  • Spread Nutella evenly and sprinkle the toasted nuts.
  • Start from the opposite end of the dough, roll the dough neatly in a line towards you. Roll as tightly as possible. Dust fingers with flour if the dough feels sticky. Pinch the seams to seal.
  • Using a sharp knife or bench scraper, cut into1 inch thick slices and arrange in your pan(s). Place them spaced apart.
  • Let the the rolls double in size. It might take 45-60min. Preheat oven to 180 degrees C / 350 degree F towards the end of the rise time.
  • Bake for 20 -25 minutes until golden brown. 
  • Brush the rolls with melted butter for a softer crust. Cool in the pan for 5 minutes, then completely on the rack.


Tuesday, January 15, 2013

Basic Vanilla Sponge Cake


A basic sponge is a fluffy, soft. delightful cake which is a treat for the palette. You bite into this not so sweet lightness, makes your heart sing.

The very first cake I tried with my new oven was this basic vanilla sponge. This light airy cake uses vegetable oil instead of butter, hence healthier than the regular cake.

I had promised my sister that my nephew's 2nd year birthday cake would be prepared by none other than his chikkamma (aunt). So I had to get going, see if I could bake a decent cake. Of course, the oven was also new. Once the cake was baked, I had some whipping cream ready. Chilled the bowl and blade of electric mixer and beat the whipping cream till it held medium peaks. A semi sweet whipped cream frosting with this light cake made this maiden venture extra special. The cake was enjoyed by family and was gone in no time. To say the least, I was a happy baker!

Vanilla Sponge Cake Recipe

Ingredients:
1 1/2 cup Flour
1 cup powdered sugar
3/4 cup vegetable oil
4 large eggs
1 tsp baking powder
1 tsp vanilla essence

Method:
Sift flour and baking powder together twice.
Beat eggs till light and frothy to about 3 times the original volume.
Add the vanilla, sugar and beat again for about 2minutes.
Pour in the oil continuously in a stream while continuing the beating.
Fold the flour mixture gently into the wet ingredients.
Pour into the greased tin, dusted with flour.
Tap the tin couple of times so that the bubbles settle down.
Bake at 180C for about 25-30min or until a toothpick inserted comes out clean.

Notes:
1. Pour the sugar and oil into the mixture slowly and continuously.
2. Move the mixer in one direction only lest you let the air out from the batter.
3. Don't mix the flour in frantically. Gently cut and fold in circular motion.
4. Gluten will start forming if you overmix.

Happy Baking!

Budding Baker